top of page
Writer's pictureBankky N.

Ruffled Flutter Sleeve Dress Tutorials For 18" and 14" dolls Free Printable Pattern

Updated: Jan 19


1. cut all the pattern 10 pieces.  * use 1/4” seam allowances 


2. Pin and Stitch the bodice front and bodice back together at the shoulders 

   Do the same thing for the bodice front lining and back lining. 


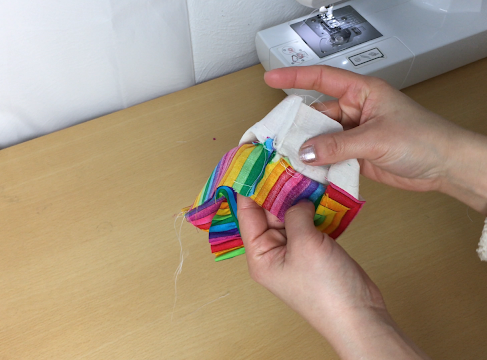
3. Fold the armhole wrong side together and press; Gather the armhole ruffles; Press.


4. Pin ruffle to the armhole edge stitch to secure. 


5. Pin lining to the bodice having right sides together and edge even. Stitch along the armhole and then the neckline to the back bodice edge. 


6. Clip the curved, Turn the right side out; press. 


7. Pin bodice front and bodice back sections together at sides; pin lining section together at sides. Stitch in one continuous seam.


The bodice part is Done.


Make skirt


8. Hem on the edge of the skirt and lining. 


9. Gather the upper edge of the skirt and lining.


10. Adjust gathers for matching to the bodice. 


11. Stitch the skirt at the lower center; Press the seam open. 


12. With the skirt's right side together matching center back of the skirt and lining, Pin and stitch the opening edge on the back of the skirt.


13. Put the bodice piece inside between the skirt and lining Pin and stitch.


14. Turn right side out; press.


15. cut Velcro about 2.5" stitch on the back of the dress.


And the cute little dress is Done! I know its a lot of steps for sewing but in the end is all worth it (^_^)


Was this tutorial helpful? Consider buying me a cup of coffee!

Donate or Venmo Me @Bankky-Nomoto

It will help cover the costs around here and encourage more free patterns and tutorial


Thanks for stopping by

and allowing me to share a little of my passion

I Hope You Have a nice day!

And don't forget to Do more of what makes you happy!

HAPPY BANKKY / CRAFTY MOM

120,762 views29 comments

Recent Posts

See All

29 Comments


Bérangère Pailler
Bérangère Pailler
3 days ago

Merci beaucoup pour tout vos patrons😍 , je vais bien m'amuser .

Je reviendrais poster des photos ☺️

Like

Shelley Clancy
Shelley Clancy
Sep 03

Is this still available ? I can’t seem to download it

Like

kathypetruzzelli
Mar 07, 2023

Thank you for the adorable pattern. It was exactly the style I had been looking for. I am confused by the instructions for the skirt back. Same as a comment in 2021, on the pattern the notch at the center back of the skirt is at the bottom, but in the photos, the notch is at the top. I had questioned before I cut out my pieces because a Simplicity pattern I have has the notch at the top. Fortunately by fabric can go in either direction, but I would love clarification if the notch that sticks out is the top of skirt/waist or is it the hem? Thank you again for the pattern and directions with photos.

Like
Sandi Limon
Sandi Limon
Apr 16, 2023
Replying to

The larger (notch) is at the top, this makes it possible to sew the skirt and lining together to finish the open end. Just flip the pattern piece over, if you cut it wrong, recut correctly, this pattern is heavily gather so it won‘t make a difference.

Like

Louise Roumieu
Louise Roumieu
Apr 20, 2022

Thank you ! I made the 14'' for a new Wellie Wisher (14.5''). I hope it fits !


Like

medpro3
Oct 29, 2021

Tips for the Ruffle Sleeve dress: since you can also line just the bodice and not the skirt, I add some to the bottom bodice hem, then iron it under 1/4" all around, sandwich the skirt into the bodice later and you will have a smooth edge to topstitch around.

When sewing around the neckline, roll the ruffles Away from the neck inside and put a pin thru outside so they don't get caught in that narrow shoulder space.


Like
bottom of page