Kids Montessori Apron with free printable pattern
- Bankky N.
- Jan 11, 2021
- 2 min read
Updated: Jan 11, 2023

Dear crafty friends,
Usually, I only do doll printable patterns but because of many requests for this apron so I give it a try. In the pattern, I include 3 sizes S, M, and L for kids 3-8 years old, The pattern is very simple and you can modify the length of the apron to match your kid's height by adding couple of inches on the bottom of the pattern. this project takes me less than 30 min and what I loved the most about this apron is the Velcro at the waist and neck strap makes it easily slides overhead so they can manage this apron independently!
I hope you enjoy this tutorial (^_^)
PS. the printable patterns are at the bottom of the page!
Much Love
Bankky
Video Tutorial
Materials
- Fabric requirement : (S 32" x 22"), (M 34" x 24"), (L 36" x 26")
- 16" -18" of 1" Elastic
- 2" of Velcro
Tip for sewing
*Print out all the pattern pieces and tape them together
from pages 1A, 1B, 1C, 1D, and 1E Then cut to the size you want.
**Prewash, dry and iron your fabric before you sew it.
***Use 1/4 seam allowances
****Waistband and neckband using the same pattern.
*****Don't forget to backstitch at the beginning and end of a seam
to hold the stitches in place.


Instruction
1. Fold the strap for the neckband; stitch the long edge and turn right-side out then
insert elastic, and stitch both ends of the strap to secure the elastic.
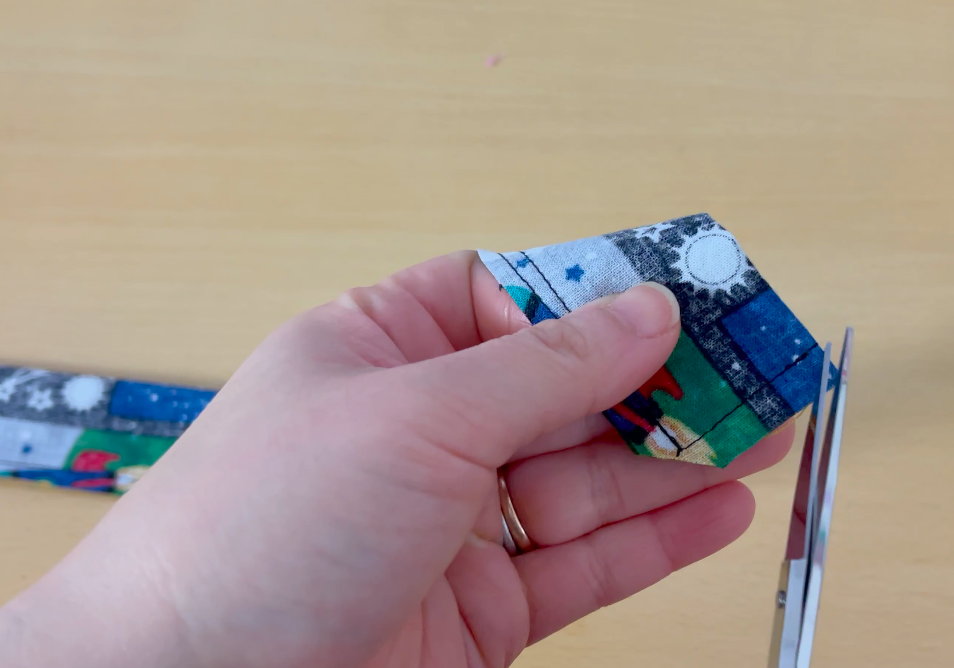
2. Fold the waistband; stitch one short edge and along the long edge,
Trim the corner and turn the right side out; Press.
3. Stitch the rough side of Velcro to the finished edge of the waistband and topstitch.

4. Pin the neck strap and waistband to the apron front piece, make sure the Velcro side facing toward you.

5. Put the apron lining piece on top, pin start stitching from the side of the apron leaving 3" for turning.

6. Clip the curve and corner.

7. Turn the right side out; Press.

8. Stitch the soft side of Velcro to the front of the apron then topstitch all around.


Was this tutorial helpful? Consider buying me a cup of coffee! Venmo Me @Bankky-Nomoto
It will help cover the costs around here and encourage more free patterns and tutorial


